Pages

Showing posts with label game of thrones. Show all posts

Monday, 1 October 2018

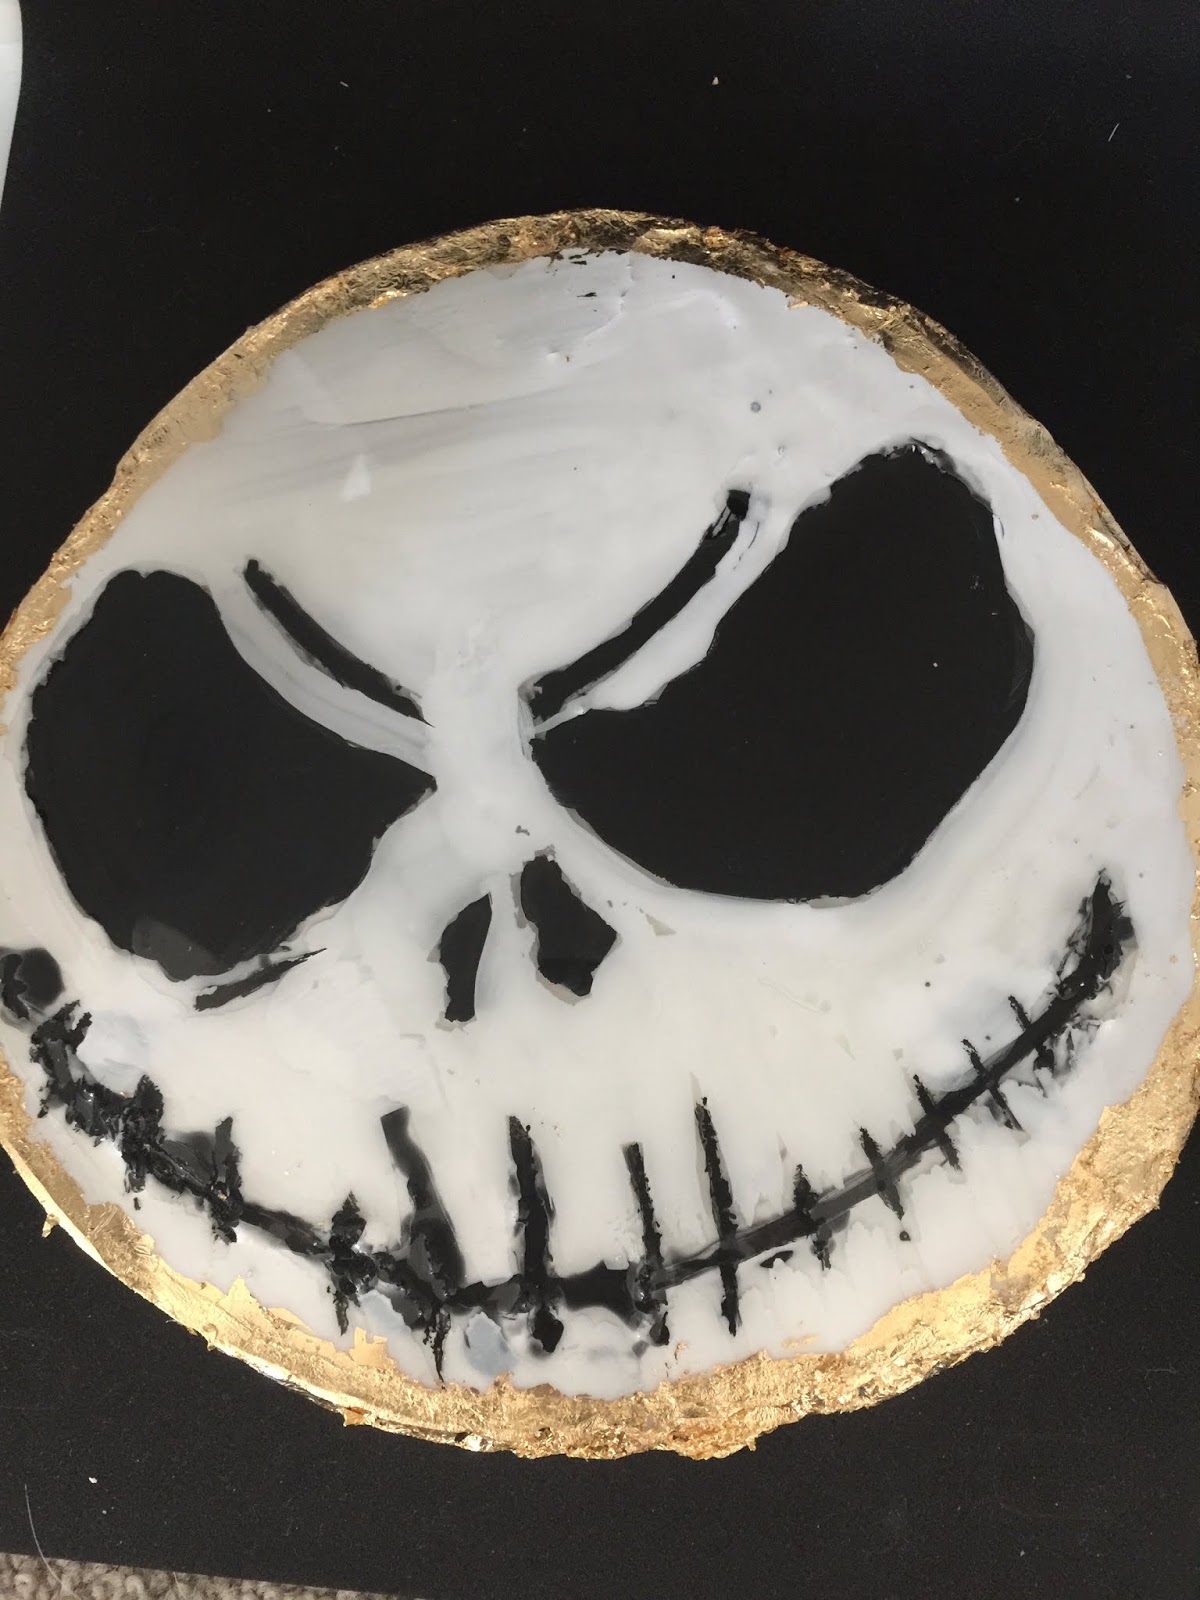
Making a Jack Skellington Resin display piece, and a Direwolf pendant piece from Game of Thrones

Making Resin Display pieces and a large pendant


 These resin pieces were my first attempt at using silicone as a barrier for resin.  I was dubious to begin with, but pleasantly surprised.


 I printed out the picture that I wanted.  I was thinking about my daughter and her University Graduation while doing this, and she absolutely adores The Nightmare Before Christmas.  So Jack Skellington it was.  I put baking paper on the top of the picture, for two reasons, one it is see through and two the resin should just peel off it and the silicone too.  It did, so yay!!😛


Look at me using a caulking gun, I think that is what it's called.  My son set it up for me lol 😉.  I bought the silicone tube from a cheap shop here, while paying for it the man behind the counter looked at me and said, do you have the gun that you need to use this with?  I looked stupidly at him and said, of course.  Hoping that my husband would have something in his shed of wonders.  He did, phew.
So I ran about three lines high of silicone around the outside of the face, and around the black parts of his face, so the eyes, the nose and the mouth.  I did this to stop the white resin from leaking in.  I let the silicone dry for a day.


I then made up and poured some white resin into the "mould".  Held my breath and kissed my pug for good luck lol. 


24 hours later he's looking a little rough.  I was concerned, but things take time and layers I am learning.  I let him dry for another day, removed all the silicone, you want the resin to be completely dry before removing the silicone.  I tried to take it out after a day and it was a little more difficult.  The next day it just peeled off, phew. 
I then made up and poured some black resin into the gaps for the eyes, mouth and nose.  Let it dry for at least a day.
 I thought about my next move, I put painters tape around the edge, poured a layer of clear resin and let it dry.  I did this to fill in the gaps that I had from improper silicone use.


Once it had dried for a couple of days, I sanded all the sharp edges off.  I then stared at it a little more, and decided I would use black acrylic paint to fill in any of the gaps I missed with the black resin.  Added some white acrylic paint to cover up some little spillages and voila!

Another very thing layer of clear resin, another day or two of drying.  Little more sanding on the edges and then I added the leafing size glue to the edges and a part of the top.  I wanted to add gold leaf to them.  I waited about an hour, placed the gold leaf where I wanted it and done.  Now I just need to find or make the perfect display stand.


I tried a different technique with the Starks Direwolf Pendant.  I printed out the Direwolf, put baking paper on top, made a barrier with silicone.  Let that dry for a day.  I then covered the whole piece with white resin, and then let that dry.

 I was going to use black resin to fill in the Direwolf, but I thought black acrylic paint would be nicer (easier).......It was lol.  A couple of black paint layers later and I added some clear resin.
It got a sanding on the edges too.  Then the same treatment for gold leaf.  I am adding a pendant holder to this one so it can be a necklace or maybe even a pin thingy that people wear on their clothes.
 GLAMOUR SHOTS


Here is the link for my Youtube Channel.......MY YOUTUBE CHANNEL!!

Please like, comment and subscribe!

Please follow me on facebook........... KristinaObrienart
I am also on Instagram.......... https://www.instagram.com/kristina_obrien_art/
Aaaand Pinterest....... https://www.pinterest.com.au/krystalrose316/pins/
And now on Etsy.........  https://www.etsy.com/au/shop/KrystalRoseCreations?ref=seller-platform-mcnav
And now Youtube.......https://www.youtube.com/channel/UCpgFuUdFo0dyREOhcSgXBrw

Until next time.........


Wednesday, 4 July 2018

Painting Tyrion Lannister's greatest moment in Game of Thrones........

Tyrion Lannister's greatest moment you ask, there's so many, True, but this......

Was his proudest moment don't you think?

To begin with I do not chose the easiest of characters to paint do I?  Peter Dinklage (Tyrion) was super hard to paint and honestly I am still not happy.  I can see the errors everywhere, but that is where time and practice come into it.

To start with I wanted to paint him on a wood canvas.  Aldi actually had some wood boards for sale a few weeks ago, so I got a few.  Got to be honest, I did not find them the greatest paint on.  There were also splintered edges on them,so I had to sand and gesso the board a fair bit.  Once that was done I began painting.  

As always, this bit is scary, it's the "Oh crap should I just burn it and run!" moment.  I drew him very loosely in and then went over him with acrylic umber, then I did the whole board in an umber wash, basically very watered down umber paint.  I use Golden Glazing Medium though because I don't want to use too much water because under binding just doesn't sound great.

I always have a problem with backgrounds, always.  This one just came to me though, I really did want it like the reference picture.  So I looked around at tutorials to see if anyone had something similar for me.  Of course The Art Sherpa had the perfect background.  This is the link to the background painting.


I of course changed things around and added the extras that I wanted, and took the lighting in my reference photo into consideration.  Plus I added copper paint.  Oh my that is a wonderful colour!!

I went over the lines of Tyrion so the background would look complete.  This is all still in acrylics, mainly because I do not have the range of colours in oils that I have in acrylics.  Yet.

Then after doing a grey scale, which took longer than usual.  His nose and eyes and mouth were killing me, I almost gave up.  But I wanted to paint him.

I didn't have any natural light in the garage when I mixed up his face colour in oils.  As a result it was very pink, I need natural light.


This is a quick timelapse of my attempts to fix up the skin colour and get his face right.  Just doing the same things over and over again.  I needed to walk away.

After all the fiddling around I decided to just get on with it.  Just paint on the days I felt like I could handle it.  His face and angle was just so difficult, but I didn't give up.  Made so many mistakes, got super angry, but I kept going. 


I will make more in depth painting videos once I become more time savvy, right now I'm fumbling around like a little lost puppy.  This is all so new to me, I am used to hiding and not letting anyone see my work.  So this is really difficult.

I just needed to get back on the horse and start blogging, I have been scared, but I will persevere.

In a few days I will have the resin geode table that I made up on the blog.  It was my first foray into table making, large resin use and geodes, so of course I had to go big lol.  Yep, made mistakes, learnt from mistakes, I hope.  Please check out the result of my month long resin table top below.  I like it.


I will have a more in depth blog about the resin geode table, as it is long and complicated but sooooo worth it..........