Making Resin Display pieces and a large pendant


These resin pieces were my first attempt at using silicone as a barrier for resin. I was dubious to begin with, but pleasantly surprised.

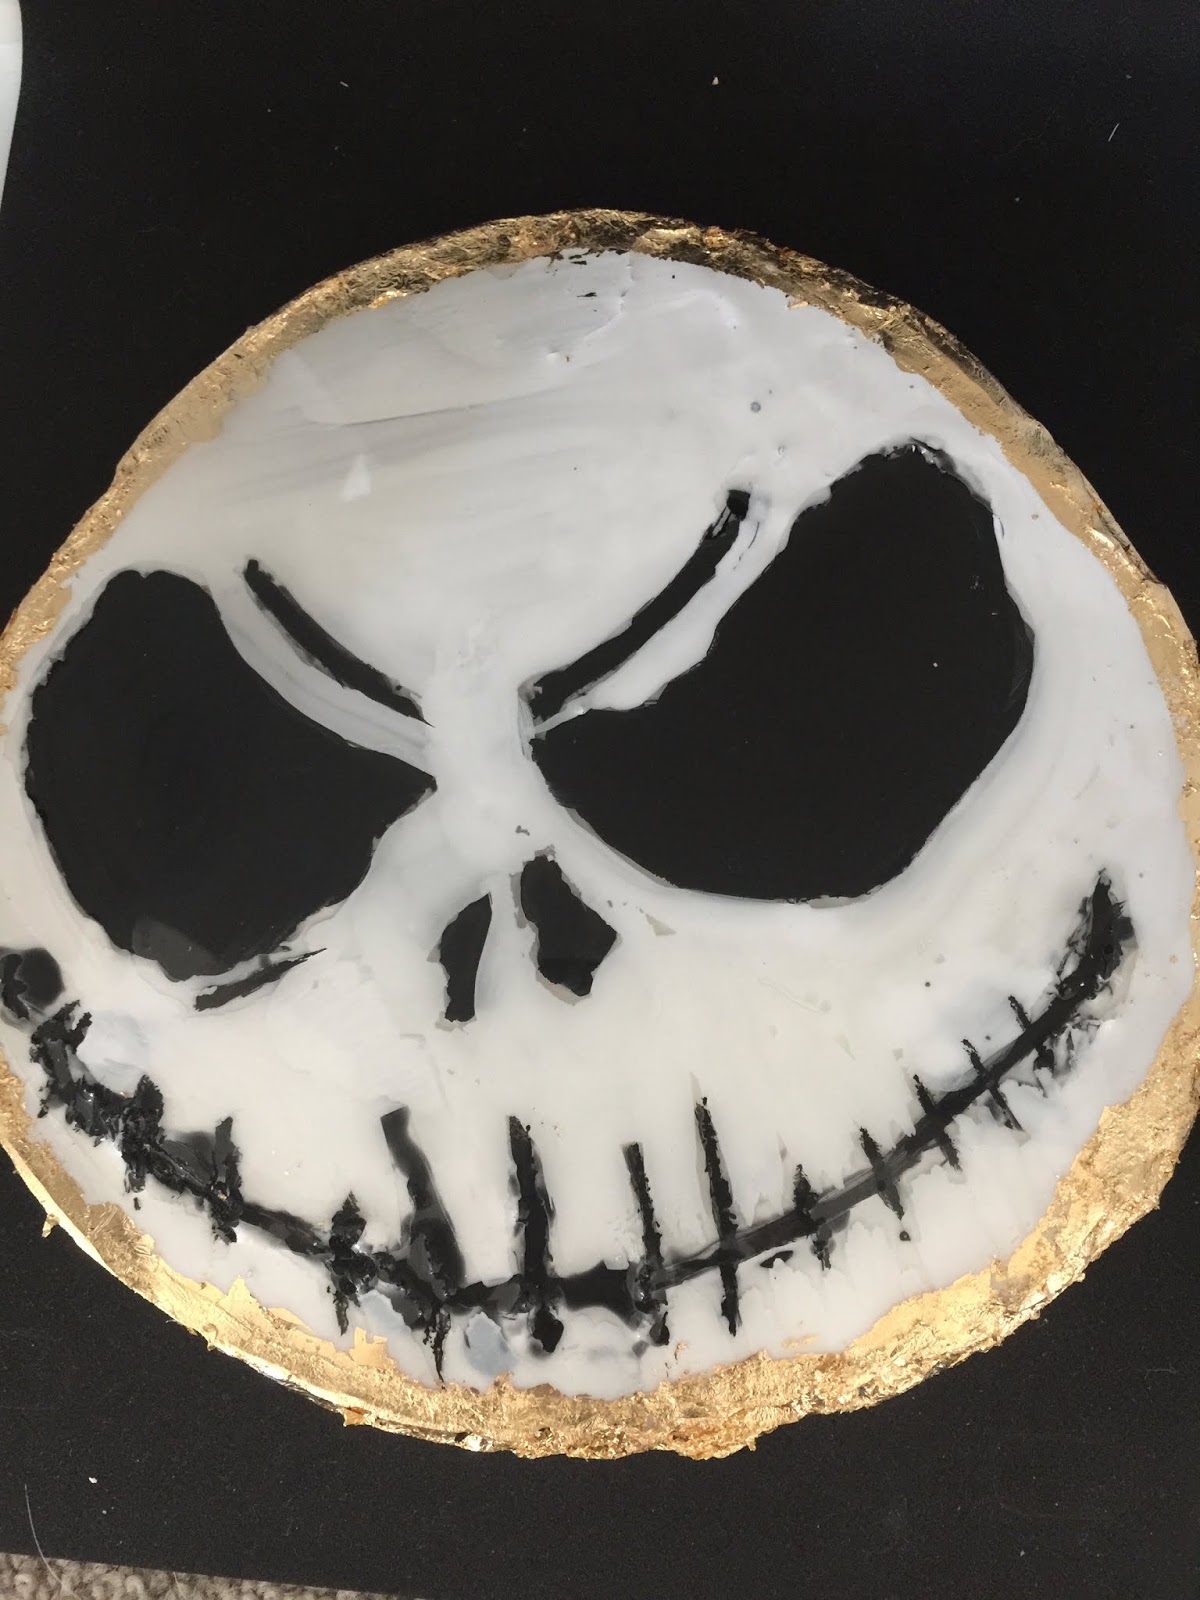
I printed out the picture that I wanted. I was thinking about my daughter and her University Graduation while doing this, and she absolutely adores The Nightmare Before Christmas. So Jack Skellington it was. I put baking paper on the top of the picture, for two reasons, one it is see through and two the resin should just peel off it and the silicone too. It did, so yay!!😛

Look at me using a caulking gun, I think that is what it's called. My son set it up for me lol 😉. I bought the silicone tube from a cheap shop here, while paying for it the man behind the counter looked at me and said, do you have the gun that you need to use this with? I looked stupidly at him and said, of course. Hoping that my husband would have something in his shed of wonders. He did, phew.
So I ran about three lines high of silicone around the outside of the face, and around the black parts of his face, so the eyes, the nose and the mouth. I did this to stop the white resin from leaking in. I let the silicone dry for a day.


I then made up and poured some white resin into the "mould". Held my breath and kissed my pug for good luck lol.

24 hours later he's looking a little rough. I was concerned, but things take time and layers I am learning. I let him dry for another day, removed all the silicone, you want the resin to be completely dry before removing the silicone. I tried to take it out after a day and it was a little more difficult. The next day it just peeled off, phew.
I then made up and poured some black resin into the gaps for the eyes, mouth and nose. Let it dry for at least a day.
I thought about my next move, I put painters tape around the edge, poured a layer of clear resin and let it dry. I did this to fill in the gaps that I had from improper silicone use.
Once it had dried for a couple of days, I sanded all the sharp edges off. I then stared at it a little more, and decided I would use black acrylic paint to fill in any of the gaps I missed with the black resin. Added some white acrylic paint to cover up some little spillages and voila!
Another very thing layer of clear resin, another day or two of drying. Little more sanding on the edges and then I added the leafing size glue to the edges and a part of the top. I wanted to add gold leaf to them. I waited about an hour, placed the gold leaf where I wanted it and done. Now I just need to find or make the perfect display stand.

I tried a different technique with the Starks Direwolf Pendant. I printed out the Direwolf, put baking paper on top, made a barrier with silicone. Let that dry for a day. I then covered the whole piece with white resin, and then let that dry.


It got a sanding on the edges too. Then the same treatment for gold leaf. I am adding a pendant holder to this one so it can be a necklace or maybe even a pin thingy that people wear on their clothes.
GLAMOUR SHOTS


Here is the link for my Youtube Channel.......MY YOUTUBE CHANNEL!!
Please like, comment and subscribe!
Please follow me on facebook........... KristinaObrienart
I am also on Instagram.......... https://www.instagram.com/kristina_obrien_art/
Aaaand Pinterest....... https://www.pinterest.com.au/krystalrose316/pins/
And now on Etsy......... https://www.etsy.com/au/shop/KrystalRoseCreations?ref=seller-platform-mcnav
And now Youtube.......https://www.youtube.com/channel/UCpgFuUdFo0dyREOhcSgXBrw
Until next time.........

No comments:
Post a Comment