Pages

Showing posts with label acrylic painting tutorial. Show all posts

Saturday, 15 June 2019

Aussie YouTube Hop Painting Tutorial of Mario from Super Mario Bros

PLAYING WITH PAINT TO MAKE AN AWESOME SUPER MARIO PAINTING

Do you have fond memories of playing a Super Mario Bros game when you were a kid?  Or even now, as an adult do you still play it?  I remember the fun with Mario Kart with my kids, but I also remember the tantrums thrown by me with the original games and those damn tubes and mushrooms.  Oh the mushrooms, how I hated them!

For this month (June) the Aussie YouTube hop theme is playing with your supplies.

Now I had problems with this theme and I almost chickened out.  All of the other YouTube hoppers are wonderful scrapbookers and mixed media artists.  I am the odd one out, and I fight this feeling every time I take part in a hop.  Playing with paint is easy, but to satisfy my need and desire to create an interesting an perfect painting that will ease my perfectionist traits is difficult.

So I came up with Mario, at first I thought I would just paint him.  He is a game so technically that is playing, but then some stupid part of my brain says hey, let's do it without a paintbrush.  Let's play with the paint.  Yep, I shall smack that voice next time it talks to me lol. It turned out ok, but my gosh it was difficult and I struggled and I huffed and I sighed a lot lol.
Here is the result of the playing with paint tutorial.

Here is the link to the painting tutorial for this months hop:


Don't forget to follow the rest of the hoppers in the list that I will have in the description below the video.  We all try really hard to give you the best video that we can come up with.  So please support all the wonderful ladies involved.


To complete this painting tutorial you will need to be able to splatter paint.  Yay messy!!
You will also need to use your fingers.  Now here comes the big warning, do NOT use Cadmium paint, Chromium Paint, or any paint with a health warning when you are using your fingers.  Just read the label on the paint to see if it has a health warning.  Craft paints are generally ok, but please just make sure.

One more warning, it is fine to paint this Mario Bros painting for yourself, or to give away, but for the sake of your sanity, I wouldn't sell anything that is copyrighted, and Super Mario is copyrighted.  So this is an enjoyment painting.

I also use Q-tips (ear buds here in Oz), and a dotting tool.  I sneak in a little paint brush because, well, if you've read my other posts you will know, I am kinda perfectionist.  I needed to use the paintbrush for a few minutes to ease the craziness in my head lol.

So I hope you enjoy this weeks YouTube video and this months hop video.  By far I really enjoy doing the hop videos, I feel like I am a part of something.

Look after yourselves, and keep arting, and farting.  Perhaps at the same time lol.


Please follow me on facebook........... KristinaObrienart

I am also on Instagram.......... https://www.instagram.com/kristina_obrien_art/
Aaaand Pinterest....... https://www.pinterest.com.au/krystalrose316/pins/

And now Youtube.......https://www.youtube.com/channel/UCpgFuUdFo0dyREOhcSgXBrw


Friday, 5 April 2019

Acrylic Painting Tutorial of a cat, with a mental health ribbon, with a Ruby Rock-It Designs competition!!!

Acrylic Painting Tutorial of a cat, with a mental health ribbon.

As most of you should be aware I suffer from mental health issues daily.  I fight them daily, some days are better than others.  Some weeks can be a ride off, but I am still here ;


This is the cute little cat that I decided to share with YouTube and teach people how to paint.  I wanted to do something relatively easy to follow, and teach.  This teaching business is not easy.  I have never done it before, I am still learning to paint myself, and I will still be learning to paint until the day I die.  There is so much to learn and know.

I am not going to go through all of the details of this painting as it is on my YouTube channel as a complete tutorial.  So make sure you check it out here:  https://www.youtube.com/watch?v=pJh8Zt2TbPM

This is a picture of me starting to paint the cat, and the new YouTube video making set up I have.  Well, it's an old video camera I kind of forgot I had because it was so hard to get the videos off it.  I still have to mess around so much to get the videos off, then converted to the right format, then add them to iMovie but I really think my videos are getting better.

I have this damn inverter in my garage that makes so much noise it's ridiculous.  I didn't realise how noisy it was until I listened to one of my videos.  When I am painting I kind of go into my head, and I don't hear much going on.  It's my happy place.


 This is my naked kitty cat lol.  Like I said before he is one of the easier paintings I have done.  I wanted it to be nice and easy so people would be more likely to do it.  I just want people to paint, enjoy art and love themselves.

I recently had a hard week, or a hard few weeks.  Some things happened that I am not going to breath life into again, but they drained me.  I began to obsess and get super depressed over everything going on.  I lost a long time school friend, but things that were said were not nice.  Yep, I gave in too an added some things I regret saying, but what she said was unforgivable.  So after a couple of weeks of not talking, during this time I was so upset about it all, I felt so awful for blocking her, I just wanted to be friends again, my body and my mind just kind of gave up this week.  I was at my sons swimming lessons and I just needed to sleep.  I began to have a panic attack because I was so tired and I didn't know what to do.  I couldn't fall asleep in the building, that would draw attention.  So I decided I had to go sit in the car and wait.  I fell asleep in the car, like a deep sleep but I could still hear things going on.  I was worried about not being able to wake up while I was asleep.  How can I drive home if I can't wake up?

Luckily I managed to wake up just as my son finished.  I drove home and went back to sleep.  A deep deep sleep.  I think it was my body and my mind saying time to shut down and just let go.  After that sleep I haven't been as upset about losing my friend.

It is amazing how mental stress can affect my body.  So I just want everyone to realise that it is ok not to be ok.  It is ok to ask for help.  It's ok to get frustrated, I do, to the point of wanting Electric Shock to get rid of my depression.  Just listen to your body, don't let it get to the point where your body just gives up for you.

You know what got me through this week?  I stopped my obsessing by putting my hand on my chest and counting the beats.  Then I thought, how many heart beats am I going to give to this "woman"?  How many of my limited heart beats does she deserve?  In all honesty none, but of course I am human so I gave her quite a few, but she is getting no more from me.  I am done with her.

So please look after yourself, forgive yourself, and keep your heart beats for the things, times and people that matter.


Please follow me on facebook........... KristinaObrienart

I am also on Instagram.......... https://www.instagram.com/kristina_obrien_art/

Aaaand Pinterest....... https://www.pinterest.com.au/krystalrose316/pins/

And now Youtube.......https://www.youtube.com/channel/UCpgFuUdFo0dyREOhcSgXBrw


Tuesday, 26 February 2019

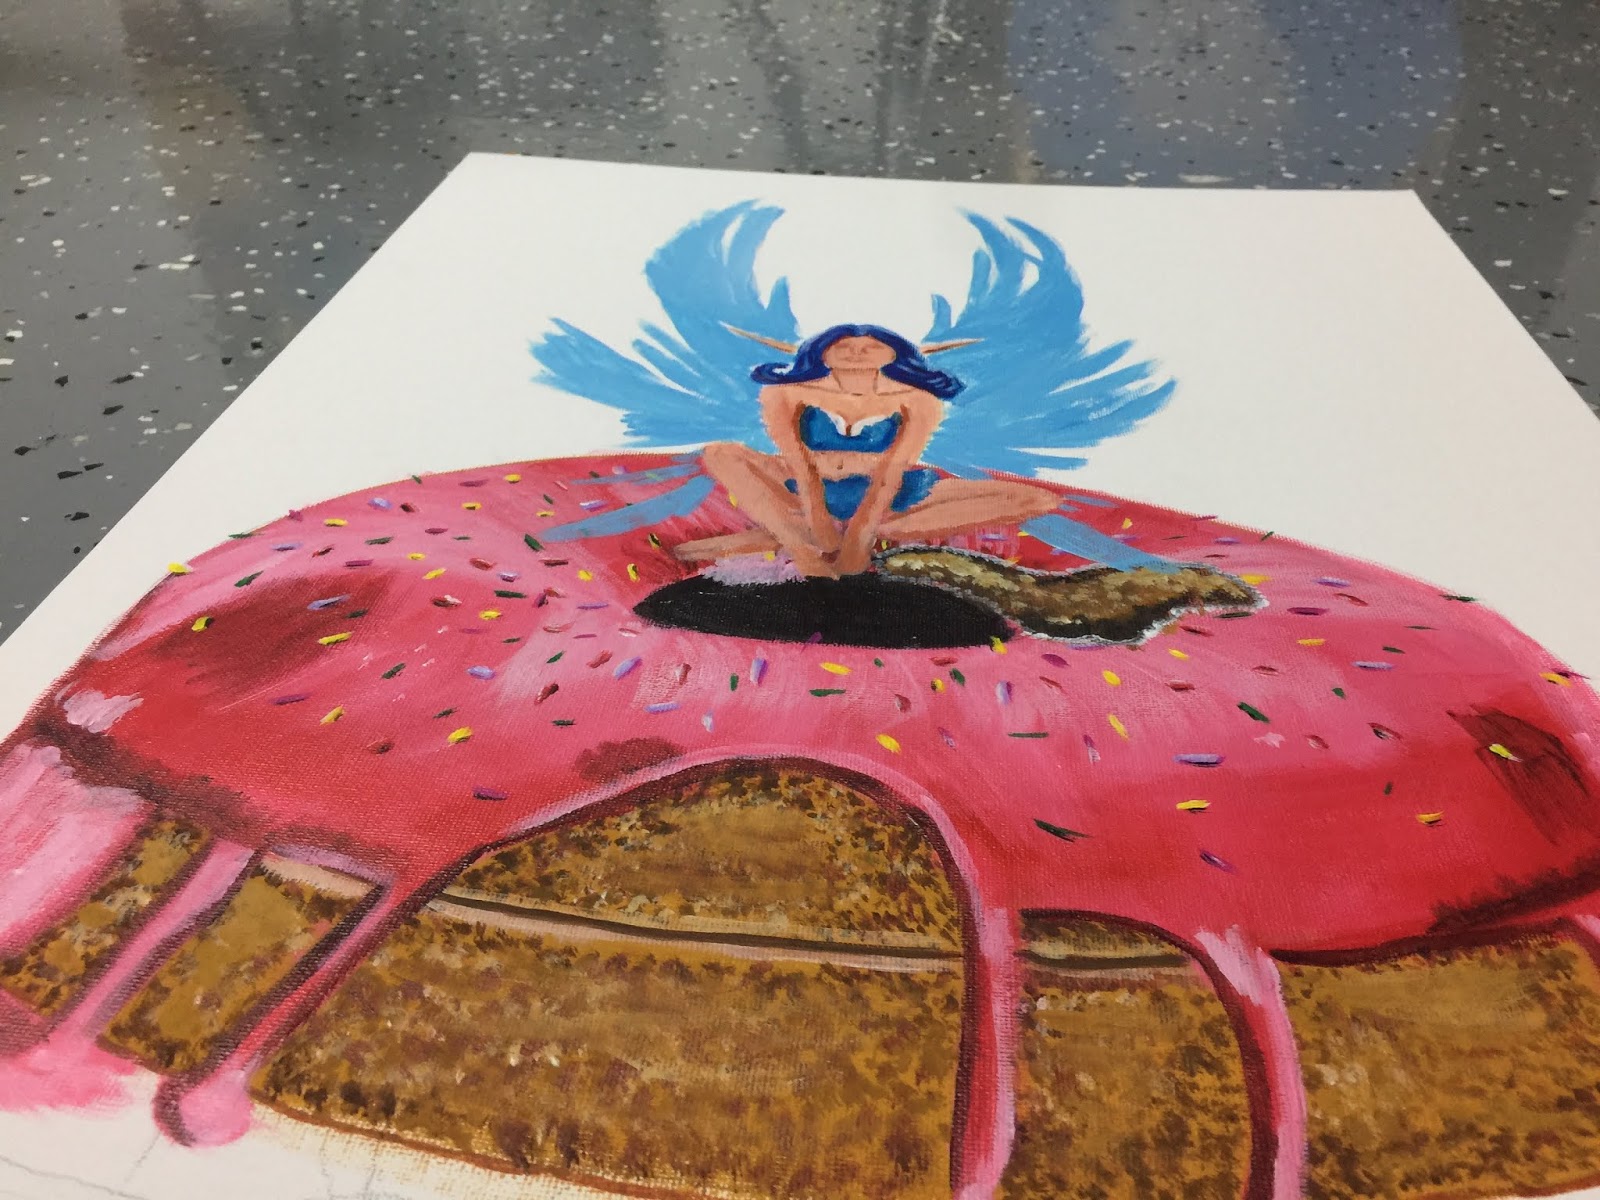
Blue Fairy on a Pink Donut Fantasy Acrylic Painting Tutorial

 Blue Fairy on a Pink Donut Fantasy Acrylic Painting Tutorial


Glamour Shots


Hey there everyone, Kristina here with another blog post on  acrylic painting.  I decided a fantasy painting would be perfect for this month's tutorial.  I really hope you enjoy painting this as much as I did.

If you are in Hervey Bay, make sure you make time to visit Art and Soul Studio, shop 2/168 Boatharbour Drive, Pialba. 
You can even shop online https://artandsoulstudio.com.au/.

Acrylic paints used in this tutorial:

These colours and more are available at the Art and Soul Studio Hervey Bay.  I mainly use Golden paints and Liquitex heavy body.  Jo Sonja has a gorgeous rich gold that I use.

Mars Black
Rich Gold 
Quinacridone Red
Brilliant Blue
Titanium White
Lavender
Primary Yellow
Primary Blue
Permanent Green Light
Dioxaxine Purple
Brilliant Magenta
Transparent Red Oxide
Burnt Sienna
Flesh Tint
Alizarine Crimson
Yellow Ochre 
Burnt Umber

Paint Brushes Used:

Large Flat Brush
16/0 detailer brush
Size 4 Round brush
Dagger Striper

I used a 16 x 20 inch canvas board. 
Gold Glitter for the fairy wings
Golden Super Gloss Varnish

Let's begin the fun!

First step is usually to paint the back ground, this makes things a lot easier and saves you a lot of time.  So if you know what colour you want the background to be then do it now.  I wasn't sure what colour I wanted until the very end.  I chose Mars Black.  So paint the whole canvas Mars Black.

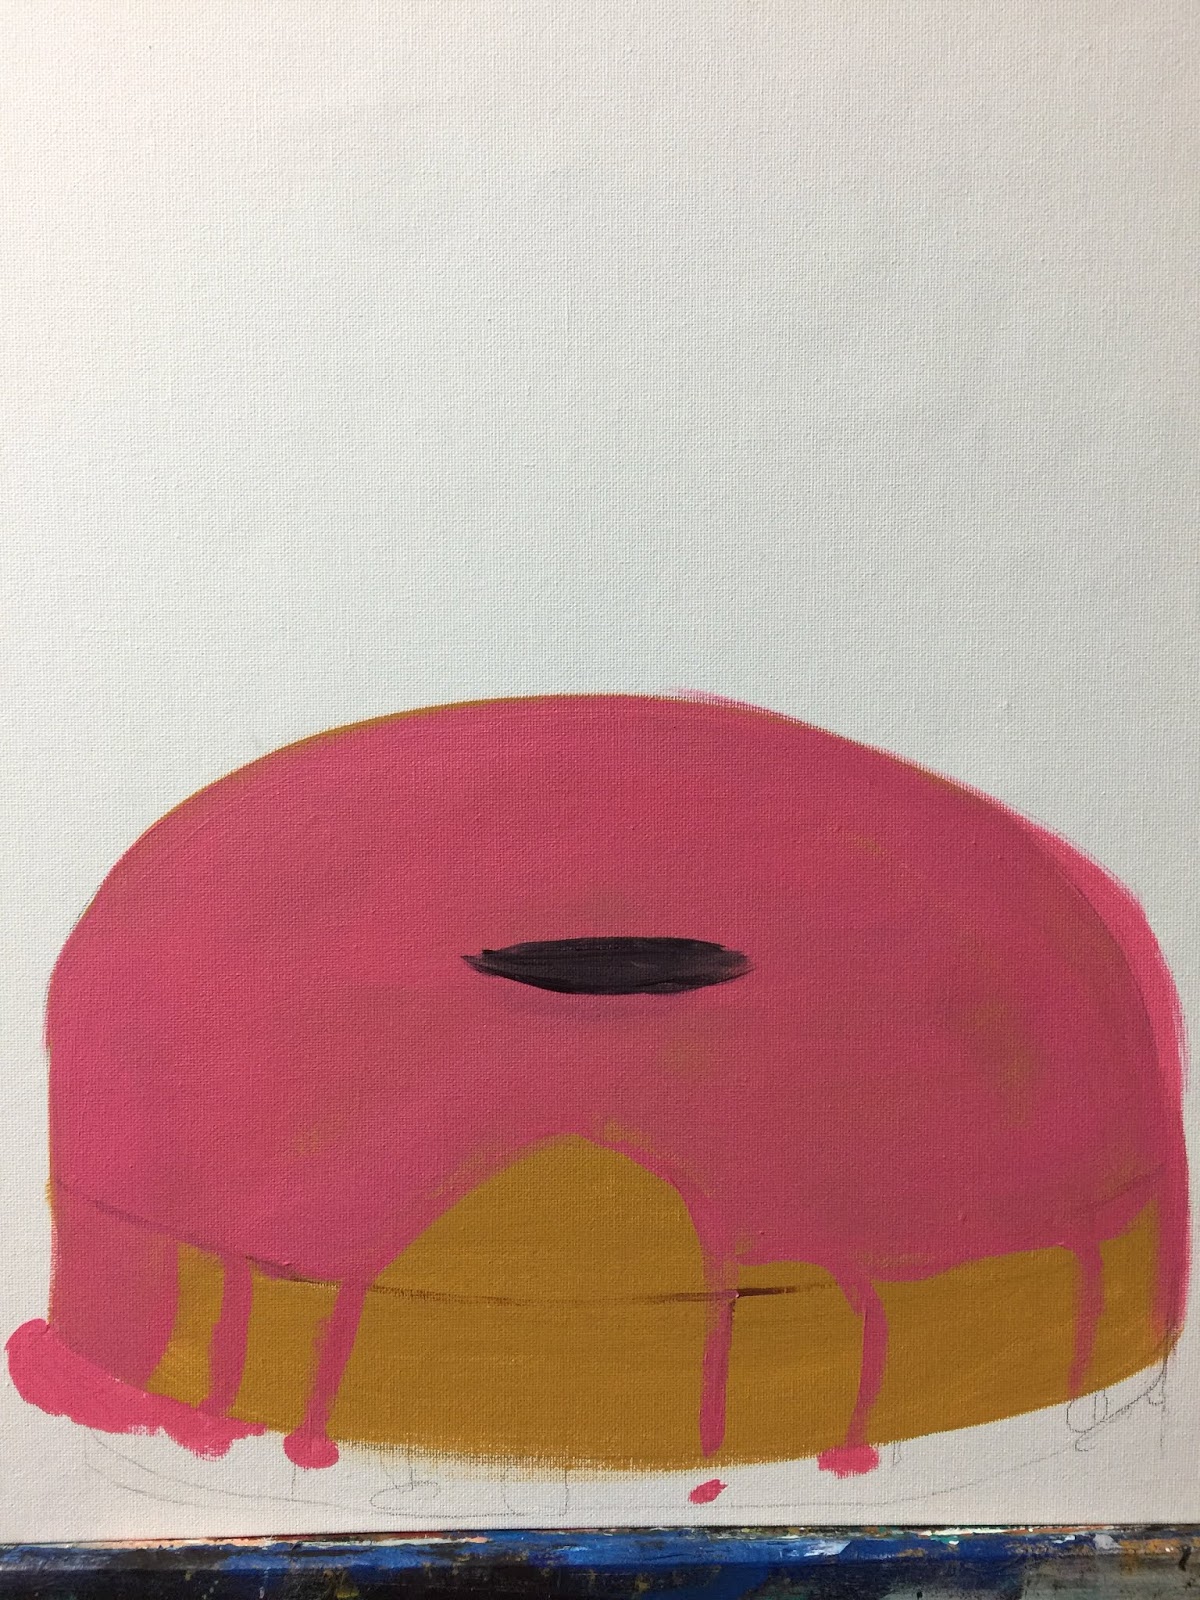
Wait for the paint to dry and sketch the shape of the donut onto the canvas.  Then paint the whole donut Yellow Ochre.  

Mix some quinadicridone red and titanium white to make the pink colour of the icing. This colour pink is perfect.


Paint over the sections marked for the icing with the pink paint. Use Mars Black to paint in the hole of the donut.

Don't worry, a few more layers and this donut will look scrumptious.

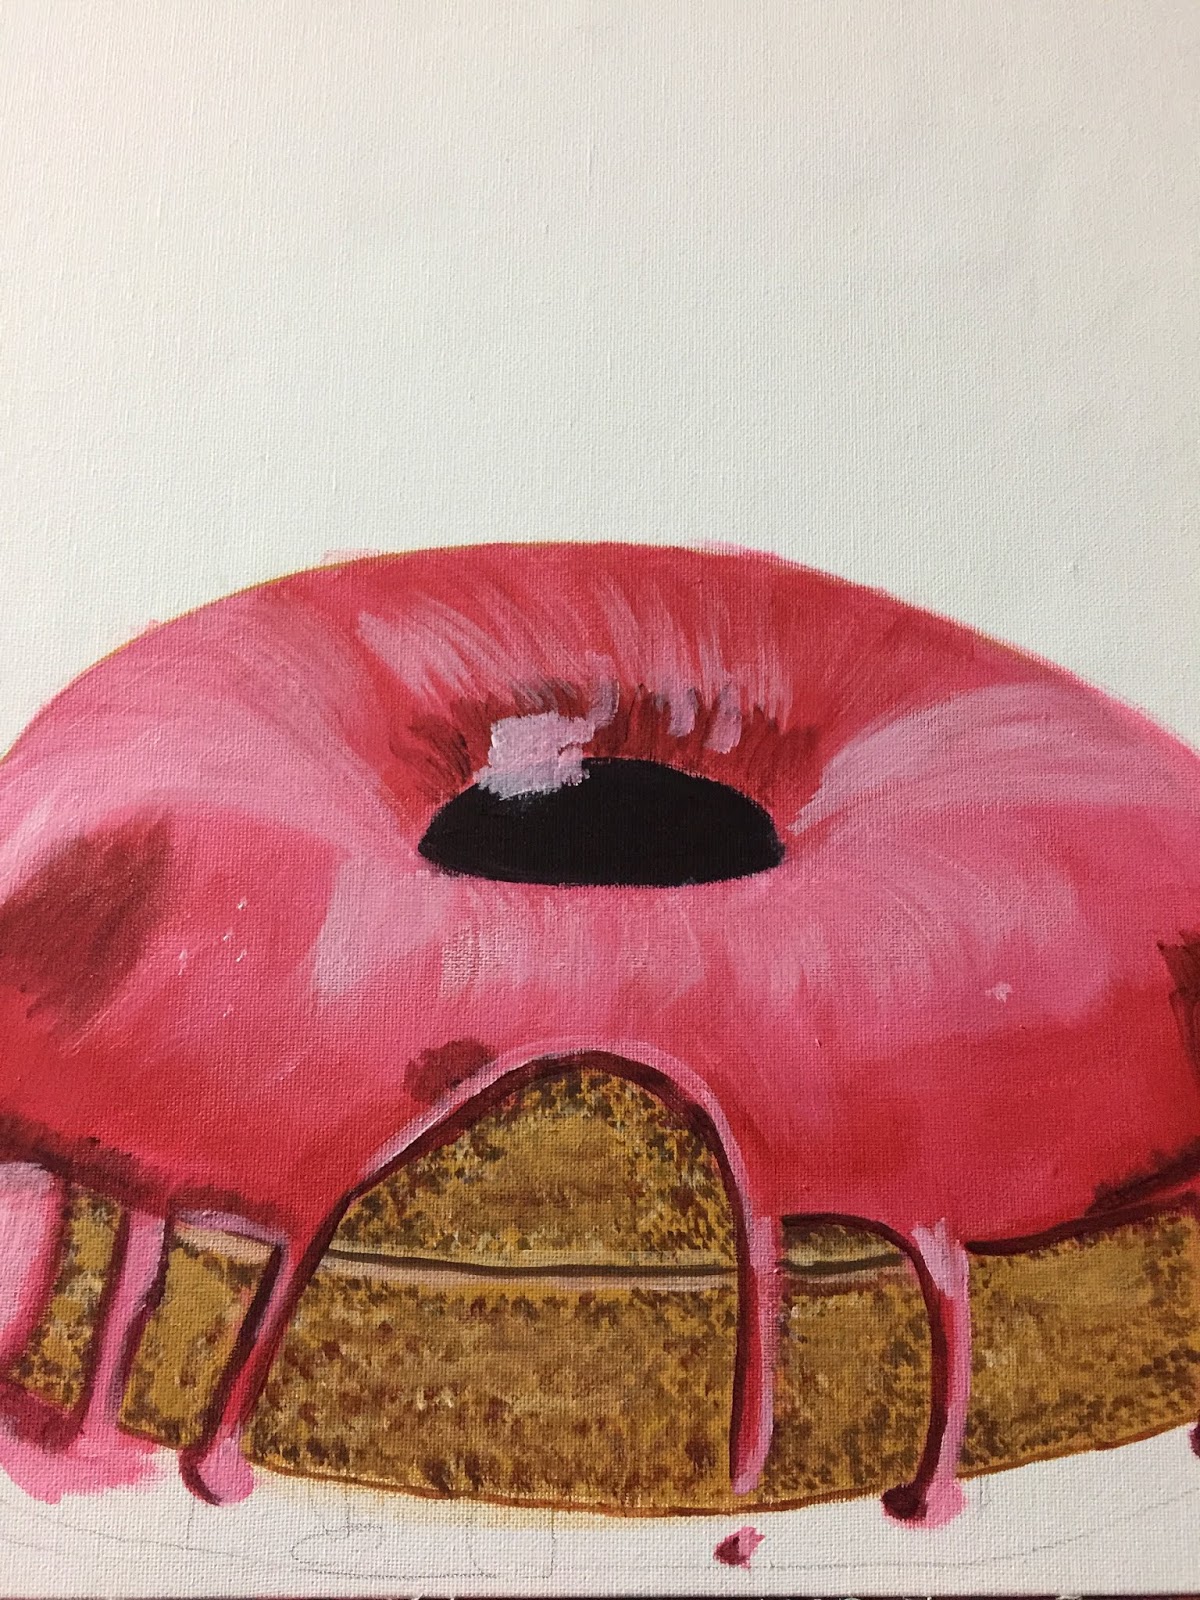
To make the texture of the dough, using a round brush just dab dots all over the yellow ochre part of the donut, using a combination of burnt sienna, yellow ochre and burnt umber mixed, burnt umber, yellow ochre and white mixed.  Cover the whole area in lots of dots, keeping the bottom of the donut darker, and the parts directly under the icing darker as well.

Using burnt umber and the round brush, draw a curved line approximately half way down the donut, to form the crease.  Add some titanium white to the burnt umber and draw a lighter line on the top and bottom of the burnt umber line to indicate highlights.


Painting the icing:

Adding shadows and highlights to the icing makes it look more realisitic, so let's get to it.

Using a 3:1 ratio of Quin red and Titanium White, make a darker pink to begin the shadows along the back edge of the donut.  Use the flat brush to curve your stroke up from the donut hole, in a curved motion forming a backwards "C".


Now for the darker highlights, just use Quin red, and a small amount of the Green Light (being opposite on the colour wheel the green will darken the red perfectly).  


Shade the donut as shown above, then using the round brush and the same colour paint a line at the bottom edge of the pink icing and the edges of the icing drips.

For the highlights use the quin red and titanium white mixture, adding more white to make it nice and light.


When painting the top of the donut, make sure you do a curved motion to make the top of the donut appear curved.  Using the light mixture of the pink and white, add the highlights as shown above.  Making sure each stroke is curved in the way you want the donut to look.

Add highlights to the icing drips as well.


Painting the sprinkles:

This is quite easy, just get the colours for the sprinkles....Primary yellow, titanium white, lavender, green light and quin red.  Paint a little line where ever you want the sprinkles, in all different directions.  To ensure nice coverage of the yellow, paint the lines white first, then wait until it is dry and paint the yellow over the top.  

Add darker colours to the bottom of each sprinkle for the shadow, and a touch of white on the top for a highlight.  This adds depth to the sprinkles.


 The donut should be looking like this, nice and edible.

Painting the fairy:


This is the traceable for the fairy, this image was downloaded off Pixabay and is free to use.  Just don't draw in the mushroom as she is sitting on the donut.  Trace the fairy into position on the top of the donut.  I used pencil so you can see it.  It is best to use chalk, watercolour pencil or transfer paper.


Using flesh tint, do a first layer on all of her skin parts, head, chest, arms and legs.


 Use the brilliant blue to paint in the fairy clothes.


Mix transparent red oxide and yellow ochre 50/50 mix.  Add a touch of Alizarin Crimson and then mix titanium white into this mixture.  You should have a darker skin tone to paint in the creases and the shadows.  Use this darker mixture to paint in the lines on her chest, under her neck, her collar bone and the outside of her legs and arms.  Where all the creases will be.


While the darker colour is still wet, use the flesh tone to blend the darker tone into the lighter tone.


The face on this fairy is very simple.  Using the darker flesh tone, paint in the outlines of the mouth, eyes and the sides of the nose.  See how hinting at the lines on the face actually makes a face appear.  It is a very simple and easy face to paint.  Paint in the hair using Primary Blue, following the direction of the hair.  High light the inner part of her breast with a lighter flesh tone.


To make the fairy a little naughty, by having bites taken out of the donut is fun and quirky. Using yellow Ochre and the round brush dab along where you want the missing piece.

Add some burnt umber and burnt sienna dabs to this bite too. 


Dab mars black around the edge of the bite, and then highlight this with titanium white.  Make sure the top half of the donut is darker, to hint at the shadow.

Almost at the end, painting her wings.  Using brilliant blue paint along the wings that you have traced on.  Do a couple of coats of blue, adding some darker tints to the parts closest to her body.

Then add rich gold to the top parts of the wings, and while the gold is wet, sprinkle gold glitter on the wet paint.  Do this for both wings.


Go over any part you think needs extra highlights, like her hair or parts of her face.  Add more glitter to the back ground, do whatever takes your fancy.  This is your painting, make it yours and enjoy the process of creating. 


Until next time.........